For great still life photography, keep it simple.

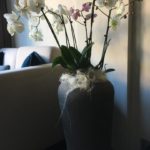
Orchid Still Life
I will readily admit, still life photography is not a style I practice a lot. It can, however, be an interesting and rewarding type of photography, especially for beginners. Still life photography doesn’t require a lot of fancy or expensive equipment. You don’t need a big studio; it can be done in your own house with everyday objects as subjects or props and you can create wonderful and creative images with a little thought and planning.
Still life is defined by the Tate Museum Glossary as “anything that does not move or is dead.” The French term for still life is nature morte meaning dead nature; we are going to define it as an arrangement of everyday inanimate objects most often arranged in small groups. Versatility is an important characteristic of still life photography; any inanimate object can become a focus for this style of photography; flowers, food, books, candles all make good subjects.

Found Still Life
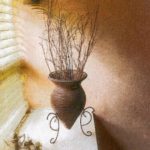
We can classify still life photography into two categories: found and created. Found still life is exactly what you would expect. You go for a walk and find a natural grouping of objects that make a good still life picture. As a photographer, you don’t have total control of the composition, lighting, background or grouping in this instance. We are much more familiar with the second category: the created still life. These are the ones we most see in photographs and artist paintings. As a photographer, you have much more control over a created still life. You control the subject, the lighting, the backdrop and the grouping of the subjects. You have complete artistic control of the composition, and this is why it is a good genre for beginning photographers.

Created Still Life
If you are a novice in still life photography, start simply using just a few objects for your composition. Be selective in your color choices; don’t blend too many colors. Avoid crowding your composition; make effective use of negative space. Negative space creates a calming mood to pictures, and that is usually the mood we want to create with still life photos. Stage your subjects to direct the eye through the picture.
Remember the Rule of Thirds, and frame your shot with the aid of the grid lines in your camera. An effective technique is to shoot the subject by placing it on different grid intersections in selecting the best composition. Another consideration for still life photography is the Rule of Odds. If you have a choice between using an even or odd number of subjects in your composition, choose the odd number. For whatever reason, odd numbered subjects are more pleasing to the eye.
Good lighting is essential to great still life photography; whenever possible use natural light. A great way to enhance your pictures is to use suitable backdrops and reflectors. Go to the craft store and buy poster board in different colors; look for soft fabric pieces such as velvet to diffuse or reflect light. Find old boards that have a rustic color with wear patterns to add texture to your photos. Be imaginative and creative. Use these backdrops to experiment with monochromatic still life photography.

Monochromatic Still Life
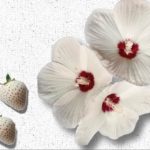
Monochromatic photography is an artistic expression of the photographer. Monochromatic photography is used to create specific moods and feel in the photograph. It is a picture with similar colors but with a slightly different hue or tint, for example, a white flower with a white backdrop. A difference in hue or tint prevents the flower from being lost in the background, but the picture has a clean, soft feel t the image. Texture can be used in the editing process to separate the primary subject from the background and add interest and detail to the picture.
The important thing about created still life is to experiment. Move things around; take shots from different angles; shoot at different times of the day with different lighting conditions; change the background; be artistically creative and most importantly have fun.
There is no reason not to try still life photography; there are all kinds of props around the house, it isn’t expensive, and you don’t have to travel to participate. Grab your camera, grab your props, find a good shooting spot and start clicking.
This is the last of an eleven part series on photographing flowers. We hope you have found it interesting, informative and improves your flower photography. If you have any questions or comments about any of the articles or about photographing flowers, contact me at cliffblackerby@gmail.com. To find previous articles in this series; check the MCMGA website, Blog archives.
Written by Cliff Blackerby, May 2020.